Location Manager
LocationModeless dashboard to list, filter, and adjust spatial coordinate offsets (X, Y, Z) and elevation parameters across elements without blocking the main Revit session.
Quick Workflow
Launch Location Manager to open the modeless window on your workspace.
Filter target elements by level, active category, or view bounds.
Modify X, Y, or Z coordinates directly in the grid, or apply batch offsets.
Click Commit to execute all changes in a single safe Revit transaction.
Interface Preview
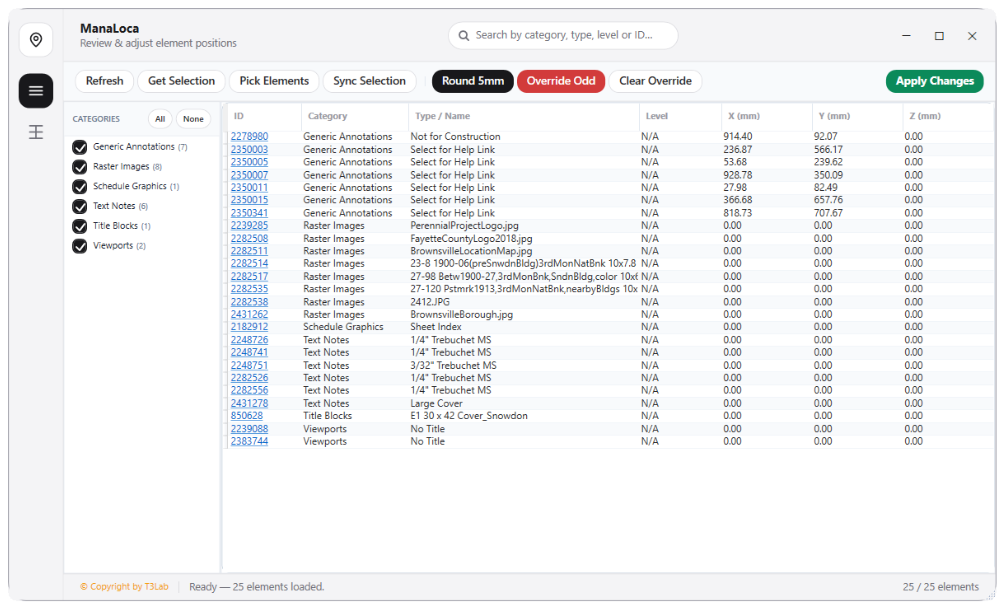
Detailed Documentation
Location Manager - User Guide & Reference
The Location Manager utility (Location category) Modeless dashboard designed to list, filter, and adjust spatial coordinate offsets and elevation parameters. Detects physical locations of elements (via LocationPoint, LocationCurve evaluation, or BoundingBox centroids), converts Revit internal units (feet) to millimeters, and allows batch coordination of elements by active view or level without blocking the main Revit session..
1. Overview & Key Capabilities
The Location Manager tool is designed to improve workflow efficiency by automating standard tasks. Key capabilities include:
- Modeless dashboard designed to list, filter, and adjust spatial coordinate offsets and elevation parameters.
- Detects physical locations of elements (via LocationPoint, LocationCurve evaluation, or BoundingBox centroids), converts Revit internal units (feet) to millimeters, and allows batch coordination of elements by active view or level without blocking the main Revit session.
2. Detailed Step-by-Step Usage
Follow these instructions to use the tool in your active Revit session:
- Launch Location Manager to open the modeless window on your workspace.
- Filter model elements by level, active category selection, or active view bounds.
- Select target elements in the data grid to highlight them in the model view.
- Modify X, Y, or Z coordinates directly in the grid, or apply batch offsets (e.g. shifts along Z axis).
- Apply graphic overrides (color coding by elevation heights or levels) to check vertical coordination.
- Click Commit to execute changes in a single safe API transaction.
3. Technical Specifications & Under the Hood
Revit API Integration
- Key API Components: Spatial coordinates parsing (
LocationPointandLocationCurveobjects),UnitUtilstranslation of internal feet units to millimeters, and modeless UI updates. - Transaction Handling: All modifications are packaged into a single Revit API transaction. If any error occurs, the changes are rolled back automatically to preserve model integrity.
[!TIP] Best Practice Tip: Ensure elements are correctly hosted before coordinates are modified, as coordinate shifts on unhosted elements might cause structural offsets.